You don’t need 88 keys to start learning piano. A 61- or 76-key keyboard can cover the basics—melodies, scales, chords, and simple repertoire—while staying affordable and portable. You’ll build technique without feeling overwhelmed, and you’ll know when you’re ready to grow. If you’re teetering between models, consider how you’ll use it now and in a few months; a clear path emerges when you weigh practicality against future needs. Keep that in mind as you choose your first instrument.
Do I Need 88 Keys to Start Piano? No: Start With What Fits Now
You don’t need a full 88-key piano to start learning. Start with what fits now, and grow later as you gain confidence. A smaller keyboard or a used model can cover essential practice—and you’ll still develop musical expression through simple melodies and dynamics.
Focus on hands separate at first, then together, to build coordination without overwhelming yourself. Use easy pieces to train sight reading skills: read the notes, play them, then repeat with a slightly faster tempo.
Keep a steady routine: five to ten minutes daily beats long, irregular sessions. Remember to label middle C and familiarize yourself with the keyboard layout; this helps you move confidently between notes.
Your progress comes from consistent practice, not from a shiny, full-sized instrument.


Why Beginners Actually Choose Smaller Keyboards and What You Gain
Smaller keyboards appeal to beginners because they’re affordable, portable, and less intimidating. You can practice anywhere, set up quickly, and build confidence before committing to a full-size model. This approach emphasizes steady progress over bravado, so you stay motivated.
You’ll focus on fundamentals: finger independence, rhythm, and musicality without being overwhelmed by size. The choice between training versus performance matters here—your goals shape what you buy and how you practice.
A digital keyboard often suits these early stages, offering built-in metronomes, lesson apps, and headphones for quiet practice. You still get tactile feedback and expressive control, just in a compact form.
If you later crave piano-like dynamics, you’ll be enthusiastic for an upgrade to a better digital or eventually acoustic instrument.
When to Upgrade: Early Signs You’ll Outgrow a Compact Keyboard
As your skills grow, you’ll notice your compact keyboard no longer keeps up with what you want to express. You’ll hit a limit in dynamics, pedaling, and range, signaling it’s time to upgrade.
- Look for clearer music notation accessibility and more expressive control with full-sized keys, aftertouch, and better velocity curves.
- Compare digital vs acoustic options to choose whether you want a weighted action, touch sensitivity, and portability, versus the warmth and resonance of an acoustic instrument.
- Plan for future repertoire and practice needs, so you upgrade before technique stalls or frustration increases.
How Key Count Shapes Your Technique Practice and Finger Strength
Keyboard size changes how you train technique and build finger strength, because more keys expand your reach and motion options. With fewer keys, you’ll focus practice on core finger independence and precision.
While more keys let you explore wider scales and voicings. Start by matching your practice scope to your instrument’s key count, then adjust routines to target the specific finger work you need.
Keyboard Size Impacts Technique
If you’re just starting, the number of keys you play on matters because it directly shapes your technique. You’ll notice how your hand position, finger spacing, and wrist alignment change with different keyboard sizes, which in turn affects accuracy and control.
Start with practical goals that build clean habits, not just speed. Focus on economy of motion and consistent touch to support future expansion into music theory and sight reading.
1) Choose a size that encourages accurate fingering, scales, and position shifts without forcing awkward stretches.
2) Practice short, targeted drills for each hand to build symmetry and coordination.
3) Track progress with simple metrics (tempo, accuracy, tone) to stay purposeful as you adapt.
A smaller keyboard can reinforce fundamentals, while a larger one invites broader technique exploration.


Finger Strength Variation
Your choice of keyboard size directly shapes finger strength development, because the reach and spacing you train on carry over to how robust your grip, independence, and control become. With fewer keys, you’ll repeatedly reach similar intervals, building practical grip endurance and consistent touch.
On a larger keyboard, reach expands, challenging you to maintain precision across wider thumb positions and mixed hand spans. Focus on deliberate repetition: scales, arpeggios, and chord patterns that emphasize even tone, not speed.
Monitor hand span and adapt fingering to minimize tension. Strength variation comes from alternating long and short notes, ensuring finger independence stays fluid rather than fixed to a single pattern.
Balance practice between comfort zone and incremental difficulty to develop robust, controlled technique.
Practice Scope By Keys
When you choose a keyboard size, your practice scope changes accordingly: shorter keyboards tighten your reach and focus your routine, while longer ones push you to expand finger independence and spatial awareness.
By selecting key count, you shape technique drills and finger strength progression, balancing precision with endurance.
Consider how a digital interface and portability considerations influence daily practice and setup.
- Short keyboards: tighten reach, sharpen control, and build precision for scales and arpeggios.
- Full or extended keyboards: encourage finger independence, cross-hand coordination, and wider spatial awareness.
- Portability and digital interface: simplify travel practice, metronome syncing, and quick warmups without bulky gear.
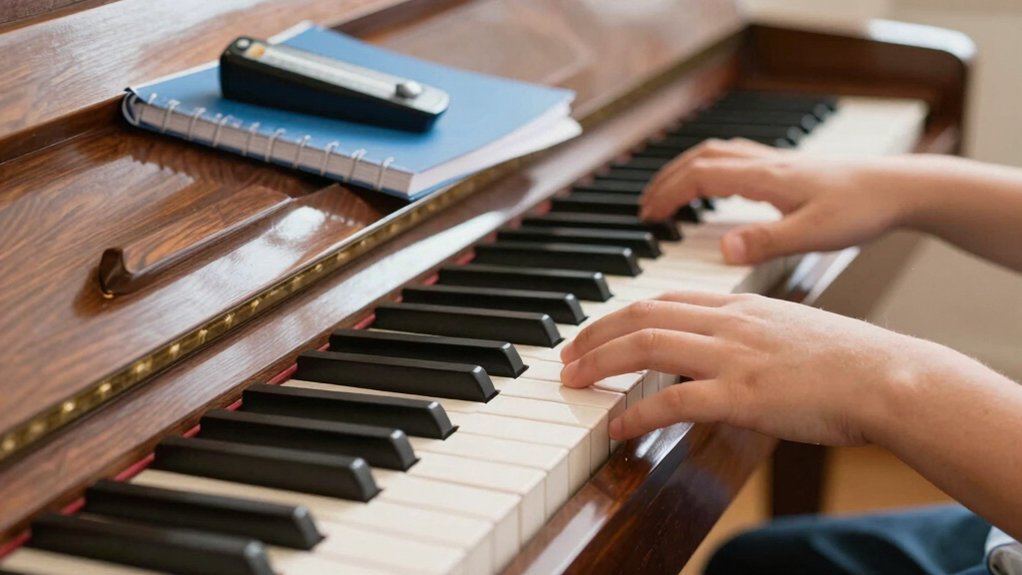
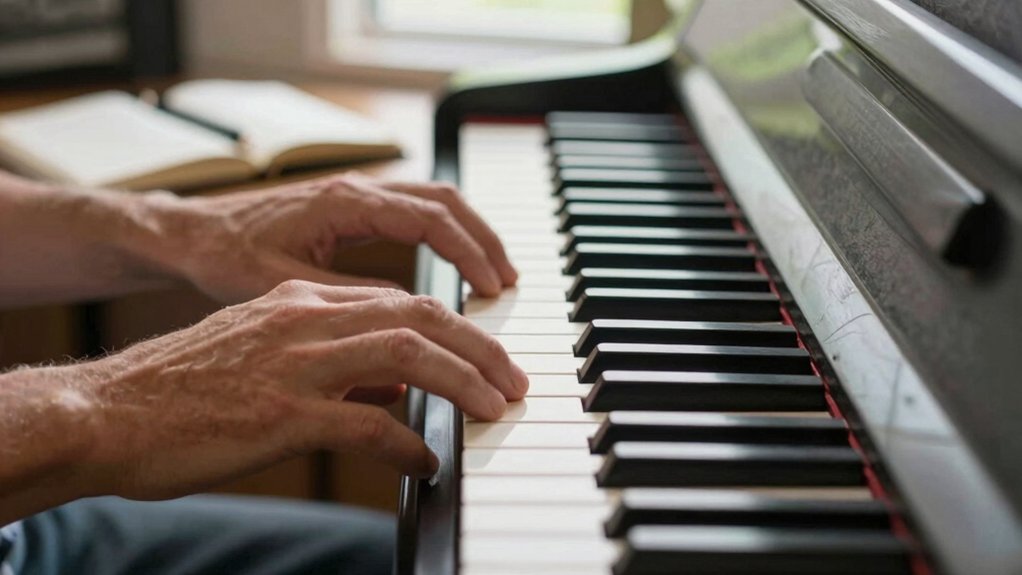
Feel and Touch: Why Keyboard Action Matters for Beginners
Understanding keyboard action helps you feel the notes more accurately. You’ll notice how touch responsiveness changes your phrasing and speed as you play, so start with a keyboard that responds smoothly.
Decide between weighted and graded feels to match how you plan to use the instrument.
Keyboard Action Basics
Touch and feel matter just as much as notes you play: the action of a keyboard determines how hard you press and how quickly you can respond. You’ll notice differences in feel between lightweight and heavier touch keyboards, and that matters for beginners learning control and dynamics.
As you practice, you’ll rely on consistent key resistance and reliable return to shape your touch with digital sampling and other technologies.
1) Learn the basics of key weighting and travel to predict how it responds to your touch.
2) Understand key sensitivity, which affects how a small press sounds louder or softer.
3) Compare action types (semi-weighted vs. fully weighted) to choose a setup that supports smooth, accurate practice.

Touch Responsiveness for Beginners
Good touch responsiveness means your fingers feel the keyboard as an extension of your intent, not a delay or inconsistency in the feel. You’ll notice how your touch maps to volume and attack, which helps you shape phrases with confidence.
Focus on touch sensitivity: any lag or uneven rebound breaks your momentum and makes beginners hesitant. A responsive action rewards precise timing, letting you express dynamics from the first lessons.
Practice with simple scales and short melodies, paying attention to how hard you press to produce the desired loudness without strain. Maintain a relaxed wrist and steady fingertip contact to preserve a clean, controllable beginner feel.
Consistency here builds accuracy, posture, and musical intention from the start.
Weighted vs Graded Feel
Weighted vs graded feel is about how the keyboard responds as you press different keys. You’ll notice two main ideas: weight (how heavy a key feels) and response consistency across the keyboard.
A graded action means lighter keys on top and heavier toward the bottom, which helps you play with natural dynamics. This matters for keyboard sensitivity and touch consistency because consistent feel across the keys makes learning easier and faster.
If you’re choosing a beginner instrument, look for smooth, predictable resistance rather than erratic feedback.
- Assess key stiffness across the entire keyboard to guarantee uniform touch
- Prefer graded action or well-balanced weight to develop control
- Practice scales and arpeggios to test response stability and sensitivity
Pedals, Tone, and Essential Features You Should Prioritize First
When you’re choosing a piano setup, prioritize pedals, tone, and essential features that directly affect practice and progress. You’ll want pedals with reliable response and clear sustain, so pedal mechanics feel predictable during scales and pieces.
Focus on tone quality: a responsive action should produce a full, even sound across the keyboard, without harsh highs or muddy lows. Essential features to value include good deflection, stable tuning, and consistent touch across the keys.
Look for a versatile instrument or keyboard with a sustain pedal, a solid build, and adjustable touch if possible. Avoid gimmicks; prioritize clarity, repeatability, and ease of use.
Your goal is steady progress, not bells and whistles—choose a setup that reinforces consistent technique and confident practicing.
Budget Paths: Solid Options for Beginner, Midrange, and Growth
You’ll start with budget instrument options that cover reliable keyboards and entry-level pianos without breaking the bank.
Then, you’ll map a beginner-to-midrange pathway that scales features as you grow, from basic controllers to more expressive models.
Finally, you’ll plan growth-oriented upgrades that improve touch, feel, and sound while protecting your investment.
Budget Instrument Options
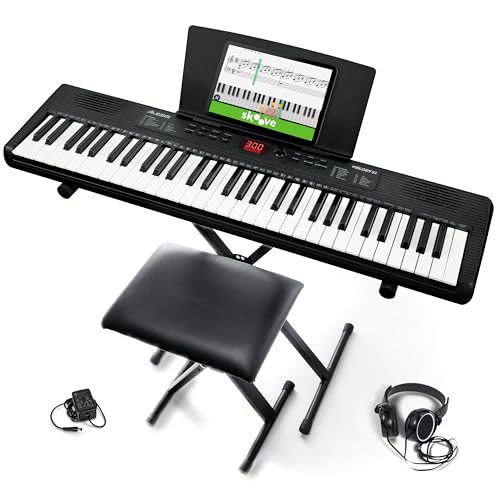
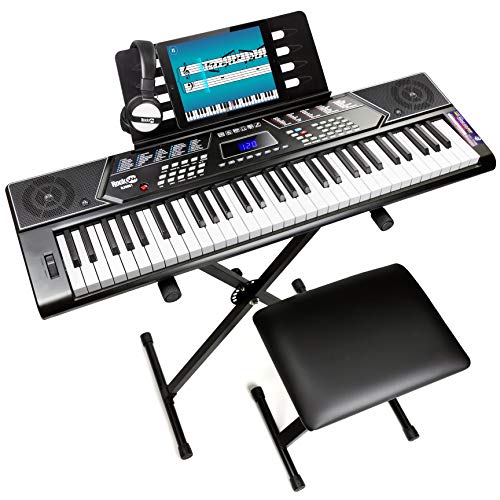
There are solid budget paths for beginners, midrange players, and growth-focused learners, so you can start learning without breaking the bank. You’ll find dependable options that cover practical needs: sound quality, portability, and basic features.
- Digital pianos under $500 with 88 keys or compact layouts for portability.
- MIDI controllers paired with affordable laptops or tablets for hands-on composition.
- Entry‑level keyboards with essential layering, sustain, and around‑the‑house usage, aiming for a low learning curve.
Choose based on your goal: play-along practice, music creation, or future growth. Prioritize reliable action on keys, solid connectivity, and clear amplification.
Digital pianos and midi controllers let you grow without overspending while you build technique and repertoire.
Beginner to Midrange Pathways
Starting with budget-friendly paths sets you up for steady progress from beginner to midrange. You’ll focus on solid, scalable options that respect your wallet while delivering reliable practice. Look for keyboards with full-size keys (even if you’re on a 61-key setup), sensible touch response, and a basic headphone out for quiet sessions.
Prioritize features that matter early: stable metronome, lesson-friendly presets, and easy recording so you can track growth. Choose models offering good digital sound without overloading your senses, so your ear develops clean pitch and dynamics.
Portability matters too, letting you practice in multiple spaces or travel light between rooms. Build a simple upgrade plan: satisfy current needs, then reassess as skills grow, keeping future purchases purposeful.
Growth-Oriented Upgrades
As you grow, upgrade thoughtfully with a clear horizon in mind: start with budget-friendly, solid options that push you toward midrange capabilities without overstepping your wallet.
Growth-oriented upgrades help you unlock musical expression and technical flexibility as you progress. Choose gear and features that challenge you just enough to improve without breaking the bank.
- Keyboard with hammer action and 61–88 keys, minus bells and whistles, for a realistic feel and accurate technique development.
- Pedal upgrades, a sturdy stand, and a bench to support posture, enabling expressive control and consistent practice.
- Midrange digital piano with layered voices and touch sensitivity, offering clearer dynamics and reliability for long-term growth.
Practice Scenarios: Solo Piano, Theory, and Repertoire Goals
To make steady progress, structure your practice around three core scenarios: solo piano work, theory foundations, and repertoire goals.
In solo sessions, focus on small, manageable pieces that emphasize melody, rhythm, and expression. Keep a steady tempo, then add a metronome to reinforce timing.
For theory foundations, study music theory concepts and apply them directly to your scales, chords, and progressions. This strengthens your reading and harmonic sense without overwhelming you.
In repertoire goals, select pieces that align with your current level and push slightly beyond it to build confidence. Include sight reading regularly to improve fluency, and use short, curated drills for quick gains.
Balance repetition with variation to stay motivated and track progression across all three areas.
Planning Your Upgrade: Decision Criteria and a Simple Timeline
When planning your upgrade, set clear decision criteria first: cost, portability, learning goals, and how soon you want to progress. You’ll compare options quickly by focusing on core needs rather than features you won’t use.
In practice, map a simple timeline: short-term purchase, mid-term upgrade, and long-term growth.
- Decide on a model that delivers solid digital sound within your budget, prioritizing portability benefits for travel or small spaces.
- Align your choice with learning goals—beginner scales and repertoire first, then advanced pieces as you progress.
- Set a realistic upgrade window, reserving room for practice consistency and anticipating future needs.
This approach keeps your plan practical, avoids buyer’s remorse, and clarifies what you’ll actually use daily.
Quick Buyer Checklist: Test Before You Buy Today
Before you buy, run a quick, hands-on test to separate truth from hype: try the instrument in person, check key feel and response, and listen for how the sound sustains and projects.
Your Quick Buyer Checklist starts with playability: do keys depress smoothly, and does the action resemble a real piano? Compare touch across ranges and listen for consistency in tone.
Assess built-in features only if relevant—metronome, headphones, recording, and tuning stability.
Consider music theory basics: can you visualize scales, chords, and arpeggios comfortably on the keyboard you test?
Weigh digital vs acoustic options honestly: feel, sustain, and pedal behavior matter more than branding.
Finally, test compatibility with your space, budget, and future goals before deciding.
Conclusion
You don’t need 88 keys to start; you need momentum. A compact keyboard fits your money, your space, your confidence. Yet the day you crave fullness—the glow of projection, richer tone, wider scales—you’ll want that expansion. Juxtapose beginner restraint with future potential: start small, grow strong. Stay practical: practice daily, master fundamentals, and plan your upgrade on measurable milestones. Humble beginnings, ambitious horizon. Your path isn’t about the keys you begin with, but the progress you nurture along the way.