
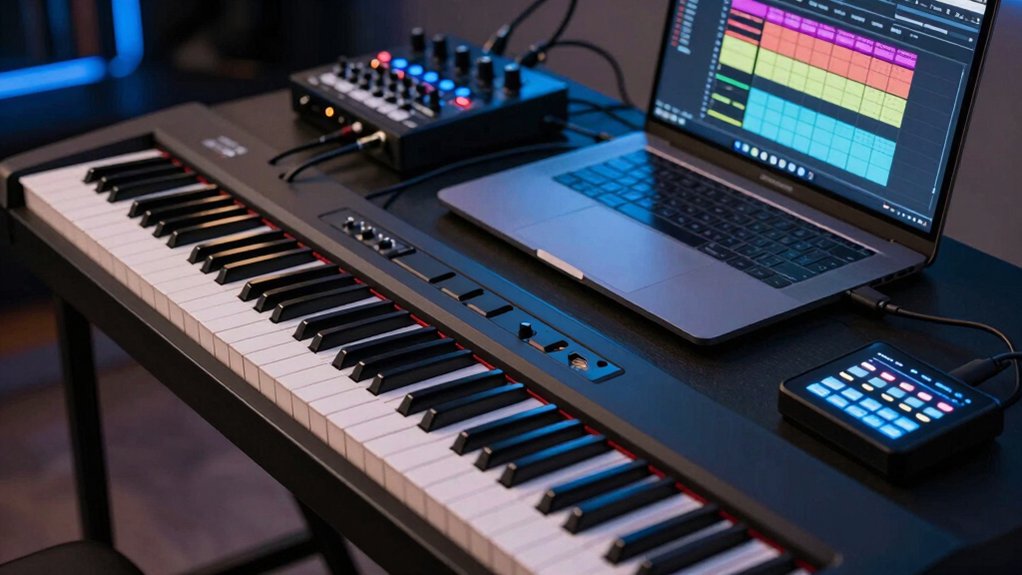
You’ll see how MIDI and USB transform your digital piano into a full studio tool. MIDI captures notes, velocity, and expression, letting you drive virtual instruments and DAWs with precision, while USB streamlines audio and data in one cable. Setups become repeatable, mappings reveal expressive control, and workflows—from recording to mixing—become more efficient. There’s a practical gap between concept and setup that you’ll want to bridge before you push ahead. Let’s start with the core capabilities and limits.
Why MIDI and USB Turn a Digital Piano Into a Studio
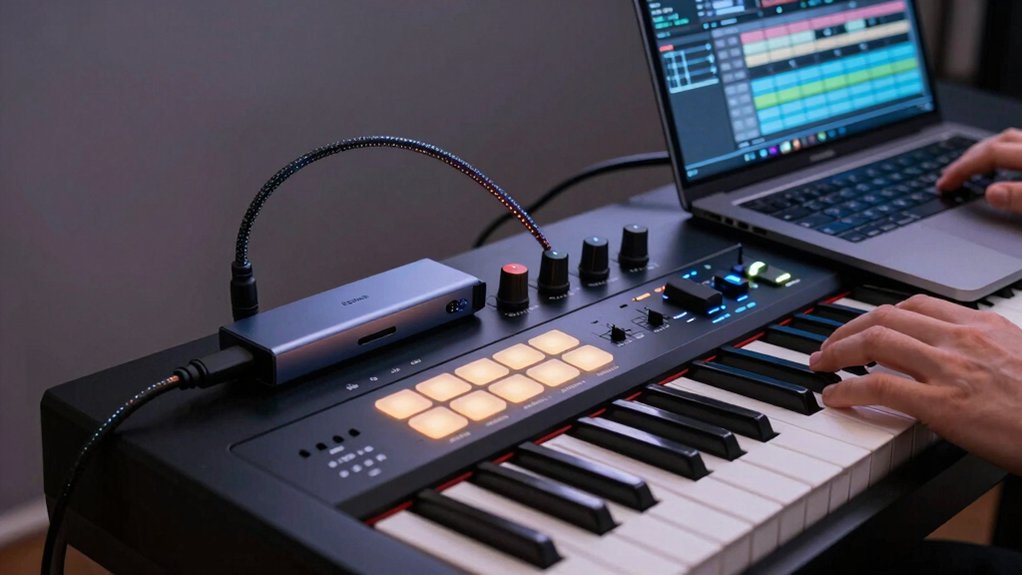
MIDI and USB connections turn a digital piano into a compact studio by enabling seamless data transfer and integration with other gear. You gain direct control over virtual instruments, external synths, and DAW timelines, reducing latency and setup time.
MIDI messages translate your keyboard performance into note, velocity, and expression data that software interprets precisely. USB audio interfaces let you route high-quality signals to and from your computer without extra adapters.
This setup supports collaboration, file sharing, and quick template recalls for different projects. For sonic shaping, analog synthesis concepts blend with digital routing to reproduce warmth and bite.
You can apply vintage effects and processors through the same path, preserving signal integrity while expanding creative options. Your workflow stays focused, efficient, and scalable.
MIDI and USB Basics: Terms You Need to Know
Understanding MIDI and USB basics starts with the key terms you’ll encounter: MIDI messages, channels, and data types; USB audio interfaces and class specs; and the differences between MIDI data and audio signals.
You’ll parse how MIDI messages encode note events, control changes, and timing, while data types separate bytes, words, and streams for reliable transport. Channels divide instruments and tracks, enabling multi-timbral setups without audio re-generation.
USB basics cover class drivers, audio vs. MIDI devices, and bus power considerations, so you know what your computer sees. In practice, this matters for music theory applications—mapping scales, arpeggios, and rhythm patterns—and for instrument maintenance, ensuring firmware stays current and signals don’t degrade.
This foundation guides precise control and clean project workflows.


Set Up MIDI I/O: Cables, Ports, and What They Trigger
Setting up MIDI I/O starts with choosing the right cables and ports, then mapping what each connection will activate on your gear. You’ll decide which devices communicate via MIDI protocol versus USB compatibility, based on current gear and latency goals.
Use standard 5-pin DIN for traditional MIDI, or USB-C/USB-B when your piano and computer support it, noting that USB often carries both audio and MIDI data. Label each cable’s role: MIDI In, MIDI Out, and MIDI Through, so data flows predictably.
Confirm baudless real-time capabilities on controllers and interfaces, avoiding unnecessary daisy-chains. Verify clock synchronization is set to a common source to prevent drift.
Document trigger mappings for program changes, control changes, and note messages. Test thoroughly before composing, then refine mappings as needed.
Map Controllers for Expressive Playability
To map controllers for expressive playability, assign each knob, slider, and pad to a specific MIDI or USB control change that aligns with your performance goals. You’ll create an expression mapping that ties tactile actions to on‑screen responses, enabling intuitive control during performances.
Prioritize assignability to parameters like filter cutoff, resonance, effect depth, and track mute/solo, so your hands stay focused on playing. Use consistent modes (linear, exponential, or log) for predictable response curves, and document each mapping for quick recall.
Consider velocity sensitivity on pads and encoders to preserve dynamic nuance when you layer parts or automate tracks. Test in context with your instrument’s timbre and live dynamics, refining mappings as your technique evolves.
This approach yields expressive, reproducible results across gigs and sessions.
Recording With Velocity, Aftertouch, and Modulation
Building on how expressive controls map to your instrument, recording with velocity, aftertouch, and modulation focuses on capturing your real-time performance nuances.
You’ll trigger velocity curves to reflect attack strength and dynamics, ensuring loudness and phrasing mirror your touch.
Aftertouch conveys sustained pressure, enabling expressive changes in timbre or filter cutoff without re-plugging controls.
Modulation, often via wheel or assignable pads, introduces subtle pitch, vibrato, or tremolo variations that define performance nuances beyond note onsets.
Use a capable MIDI implementation to record continuous data at standard 16-bit/24-bit accuracy, then scrutinize timing and CC messages for consistency.
Map aquests controls to suitable parameters in your DAW or instrument plugin, balancing latency, pipeline throughput, and lane assignments.
Prioritize expressive controls that align with musical intent and mix context.
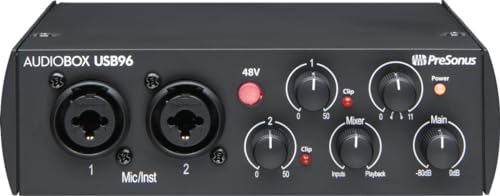
Routing and Monitoring: Hear Your Tracks in Real Time
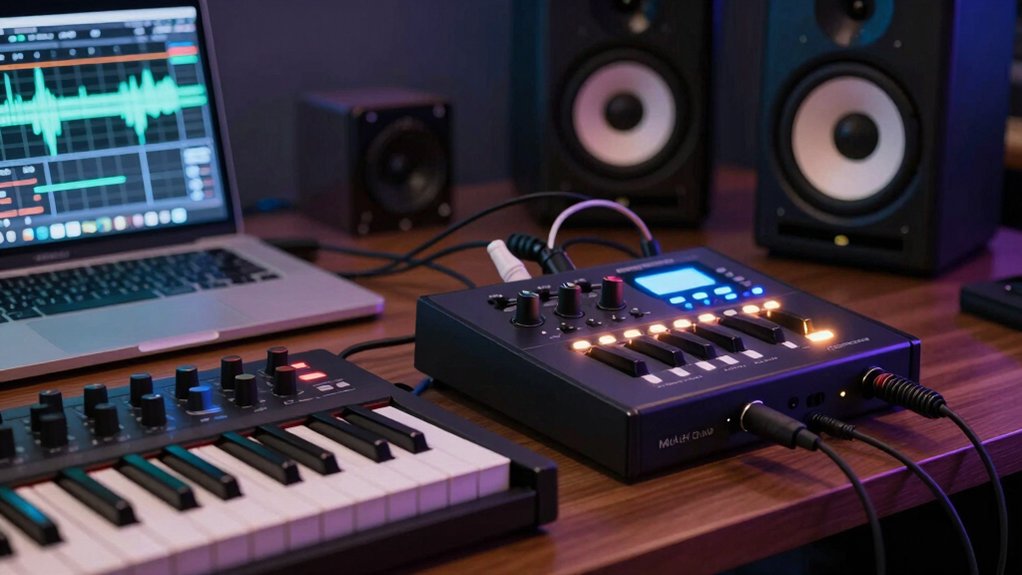
To monitor your tracks in real time, set up a direct monitoring path from your digital piano or DAW so you hear both input and playback without noticeable latency.
Use clear signal routing, choosing appropriate output and input busses to minimize phase issues and latency.
We’ll cover practical tips for Real-Time Monitoring and Signal Routing to keep your performance tight and trackable.
Real-Time Monitoring
Real-time monitoring lets you hear your tracks as they’re recorded, without latency, by routing audio from your digital piano through your DAW or mixer and back to your headphones or monitors.
You’ll set up a dedicated input path from the piano, enable direct monitoring if available, and verify that input monitoring is active on the track you’re recording.
Keep latency measurements low by selecting the fastest buffer size your system can handle without glitches, and confirm syncing between USB audio and MIDI ports.
Visual feedback from meters confirms signal flow and phase relationships, while hardware integration notes ensure compatible interfaces, drivers, and monitor analog/digital outputs.
Use consistent sample rates across devices to minimize jitter and maintain clean, accurate monitoring during performance and overdubs.
Signal Routing Tips
Even with a clear path from your piano to your DAW, you still need solid routing and monitoring practices to hear tracks in real time. Start with a dedicated audio interface and configure input channels for each instrument. Use direct monitoring when available to reduce latency, and route synths and drums to separate outputs for easy mixing.
Label buses clearly, and enable pre-fader metering so level changes reflect actual signal. Keep latency compensation on, and verify sample rates match your DAW project settings. Prioritize synth integration by mapping MIDI clips to dedicated tracks with precise input monitoring.
Check hardware compatibility between your interface, motherboard, and drivers, updating firmware if needed. Avoid looping audio through multiple converters; minimize chain complexity to preserve clarity and timing. This keeps real-time audition accurate during tracking and overdubs.
Expand Your Palette: Virtual Instruments and Libraries
Exploring virtual instruments and libraries expands your tonal options beyond built-in sounds, letting you tailor your piano’s character for every piece. You’ll mix sampled engines, physically modeled tones, and hybrid sounds via your DAW or standalone host, expanding timbral reach without buying a new keyboard.
Focus on instrument compatibility to guarantee your digital piano, computer, and controller map correctly across MIDI channels and programs. When selecting libraries, prioritize latency, sample quality, and dynamic response so performances stay expressive.
Software integration matters: choose formats your host supports, and test plugin latency with your playback chain. Organize presets by project and genre to streamline workflow. Keep stock sounds for reference, and layer selectively to preserve clarity and articulation.
This approach keeps your production precise and responsive.
Layering and Arrangement: Building Tracks Around Your Keyboard
Layered track foundations give you a solid base to build around on your keyboard, starting with a core rhythm and muted pads or bass to set the groove.
Use practical arrangement techniques on the keyboard to create complementary parts that unfold as your track progresses, keeping each layer intentional and dynamic.
We’ll explore how to balance these layers and shift smoothly, so you can craft coherent, engaging performances from a single setup.
Layered Track Foundations
Layered track foundations start with a solid core: your keyboard performance. You establish a dependable rhythm and tonal baseline by recording clean keyboard parts first, then build around them. Use a simple, repeatable groove as your anchor, and separate timing, velocity, and phrase data for clarity.
Add vocal harmonies as a separate track to explore texture without muddying the primary melody. Plan drum patterns that complement the keyboard’s tempo and dynamic range, reserving space in the mix for each element.
Use MIDI channels to route different layers, enabling independent processing and level control. Keep layer counts modest; each added track should justify its contribution to overall balance, clarity, and arrangement flexibility.
Regularly audition in context with effects and drums.
Arrangement Techniques On Keyboard
Building on the idea of solid keyboard foundations, you shape arrangement by layering elements to fit around the performance you captured. Arrangement techniques on keyboard focus on structuring parts so your live input drives the track forward.
Start with a core groove using tight rhythmic patterns that align with your tempo, then add complementary textures to avoid masking the performance. Use chord progressions to define harmonic movement without overwhelming the lead phrases, selecting voicings that sustain clarity.
Layer pads, subtle percussion, and bass lines in complementary registers, ensuring each element has its own dynamic footprint. Maintain concise transitions between sections, and craft build-ups that peak at deliberate moments.
Regularly audition with MIDI and USB routing to verify timing, texture balance, and mix cohesion.
DAW Workflows: Import, Edit, and Mix From a Digital Piano
When you import performances from a digital piano into your DAW, start by selecting the correct file type and project tempo to preserve timing and dynamics.
Next, map performance data to MIDI channels, ensuring each track aligns with your intended instrument. Use MIDI controllers for real-time adjustments during editing, enabling precise velocity and expression tweaks without replaying takes.
In the editor, separate events into regions: notes, controller data, and program changes, then consolidate for a clean edit pass.
For tracking, route outputs through an audio interface to capture stems with accurate level, latency, and monitoring.
During mixing, align phase relationships and apply subtle compression to preserve natural dynamics.
Save incremental versions to guard against workflow disruption, and document patch changes for repeatable sessions.
Troubleshooting MIDI/USB Hurdles You’ll Actually Encounter
MIDI and USB setups usually work smoothly, but you’ll encounter common hiccups that can stall your workflow. Start with reliable cabling and correct ports, then verify that channels, clocks, and modes match between devices.
If notes lag or miss, confirm MIDI-merge or local control settings aren’t conflicting, and test with a basic template to isolate the issue. When drivers or firmware seem out of date, perform firmware updates from the manufacturer’s site and recheck after reboot.
For persistent latency, review buffer sizes in your DAW and consider upgrading to a higher sample rate if system resources permit. Keyboard ergonomics matter: adjust your controller’s layout to reduce strain during long sessions.
If problems recur, document steps and test with alternate gear to pinpoint the root cause.
Grab An Extended Warranty For Peace Of Mind
Budget-Friendly Hacks for Pro Capabilities
Great results don’t have to break the bank. You can extract pro capabilities from budget gear by optimizing workflow and interfaces rather than chasing costly upgrades.
Prioritize digital piano ergonomics: place outputs, controls, and routing within easy reach to minimize fatigue and maximize precision during long sessions.
Leverage stock polyphony, layers, and split modes to emulate multi‑instrument textures without additional hardware.
For MIDI hardware compatibility, rely on standard USB/MIDI functions and ensure drivers are current; use generic host adapters only when necessary.
Map controllers to essential edits—tempo, articulation, and patch selection—to keep hands on keys.
Save projects with clear naming and consistent channel usage.
Pair affordable controllers with your DAW’s cursors and editors for fast, repeatable results.
Real-World Setups: Case Studies of MIDI + USB in Action
Let’s plunge into real-world setups where MIDI and USB connect digital pianos to modern workflows, highlighting how actual rigs optimize performance and reliability.
In practice, a compact controller paired with USB-MIDI lets you route performances directly into DAWs, preserving timing and note articulation. Case studies show layering external synths via MIDI Thru while sustain and expression pedals map to track automation, maximizing expressive control without latency.
Rig design prioritizes sensible cable management, labeled sockets, and a fixed MIDI channel plan to support live timing and repeatable sessions.
From a music-theory perspective, keyboard layouts map scales, chords, and arpeggios to predictable MIDI notes, aiding rapid composition.
Studio ergonomics matter: mounted stands, accessible controls, and clear visual feedback reduce setup time and fatigue during long sessions.
Conclusion
You push the piano’s keys, and data follows—precise notes, timing, and nuance—yet the screen glows with limitless possibility. On stage, you feel the immediacy of tactile control; in the studio, the DAW becomes a mosaic of sound. MIDI whispers discipline, USB shouts simplicity. You’re balanced between analog touch and digital potential, between constraints and expansion. The instrument you trust now transcends itself, delivering power and poetry in equal measure.