
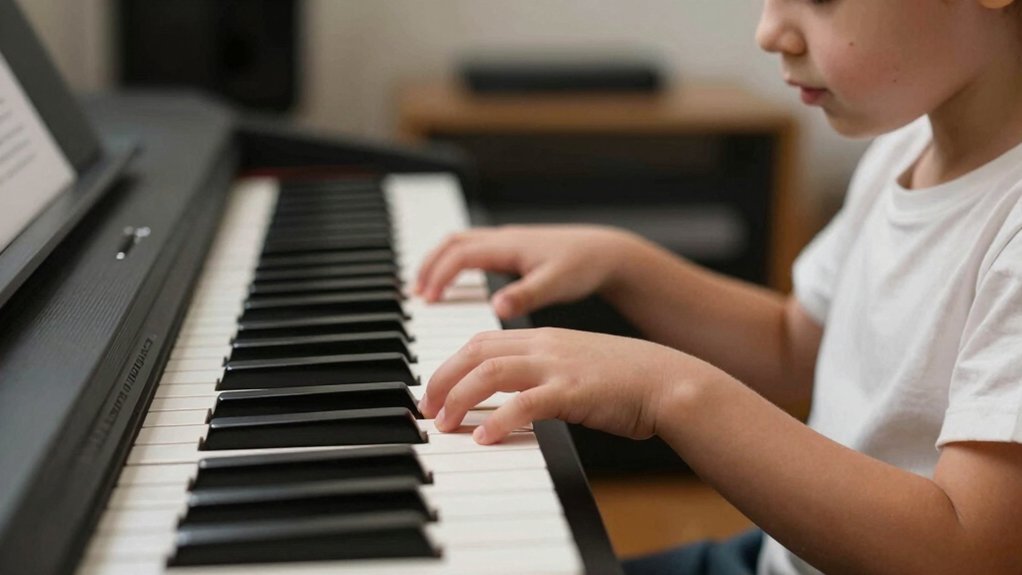
One of the most debated questions when starting your piano journey is: are weighted keys necessary for beginners, or can you get away with a cheaper, non-weighted keyboard to save money in those crucial early months? The answer to whether weighted keys are necessary for beginners isn’t as straightforward as you might hope, because it depends on your musical goals, budget constraints, and whether you ever plan to play on a traditional acoustic piano.
You might assume weighted keys are essential, but for a beginner they aren’t strictly required. You can start with semi-weighted or even non-weighted keys and still build solid technique, accuracy, and rhythm. The question isn’t just feel; it’s how you practice, posture, and progress. There’s a trade-off between realism, budget, and portability, plus how you plan to grow into an acoustic piano later. So, what choice keeps you moving forward without bottlenecks? Let’s consider the options.
Do Weighted Keys Matter for Beginners? Pros, Cons, and What to Expect

Weighted keys can matter for beginners, but they aren’t a strict gatekeeper to learning. You’ll want to weigh how weighted action aligns with your goals and budget, then test a few models to see how it feels in practice.
Pros include better finger strength development and a closer piano feel, which can ease later transition to acoustic pianos. Cons include higher cost, heavier keyboards, and the potential for overemphasizing realism before fundamentals are solid.
For some learners, non-weighted or semi-weighted options fit better with beginner preferences and daily practice rhythm. Consider how digital piano features, like aftertouch or polyphony, complement weight choice.
To put it differently, weighted keys can help or hinder, depending on your goals, practice cadence, and comfort with the instrument.
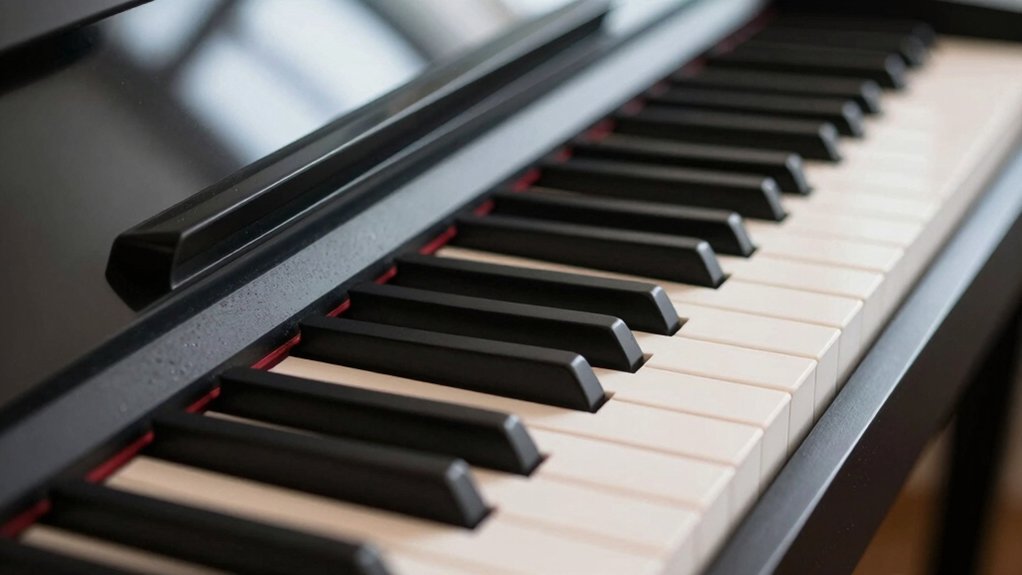
How Touch Response Differs: Weighted, Semi-Weighted, and Non-Weighted
You’ll notice that touch response varies by action type: weighted, semi-weighted, and non-weighted, each changing how you feel and play.
With weighted keys, the feel is heavier and more piano-like; semi-weighted offers a lighter, springier response; non-weighted is the light, keyboard-tickler feel.
This matters for how you control dynamics and articulation as you practice, especially when comparing how each setup translates your touch into sound.


Weighted Feel Difference
While touch response varies, understanding the difference between weighted, semi-weighted, and non-weighted keyboards helps you choose how to play and learn.
In practice, weighted keys simulate piano heft, so you feel more resistance as you press down, aiding even touch and control.
Semi-weighted keys offer some resistance with lighter action, giving quicker response without full piano heft.
Non-weighted, or synth-action, responds instantly with minimal resistance, boosting speed for jumping between notes.
Your key responsiveness will feel different, influencing dynamics and phrasing discipline.
Tactile realism matters: it shapes your finger memory, how you depress keys, and how you rebound after each note.
For beginners, the weighted feel often promotes steadier technique, while non-weighted can encourage fluency; your choice affects comfort and progress.
Action Type Variations
Action type variations shape how you interact with the keyboard and, by extension, how you develop technique. You’ll notice three touch-response options: weighted, semi-weighted, and non-weighted.
Weighted keys mimic acoustic pianos, delivering heavier resistance that can build finger strength but may slow you down at first.
Semi-weighted systems strike a balance, offering some resistance with lighter action to support quicker passages.
Non-weighted keyboards favor speed and agility, with light, direct input that can help beginners focus on tone and accuracy.
Consider keyboard ergonomics when choosing: the feel should align with your natural hand motion and avoid excess tension.
Your beginner hand positioning should stay relaxed, with fingers curved and wrists level, regardless of action type.
Ultimately, matching action to your goals supports consistent practice and progression.
Can Weighted Keys Help Build Finger Strength? What Actually Works
Weighted keys can help build finger strength, but they’re not a magic fix. You’ll gain some benefit from heavier action, yet progress hinges on technique and consistency, not hardware alone.
In practice, focus on controlled, gradual practice: slow scales, precise fingerings, and repeatable patterns that enforce even tone and contact. The key is tactile feedback—the sensation as you press, release, and rebound—which guides you toward balanced finger independence rather than brute force.
Heavier keys may improve engagement of finger flexors, but they won’t compensate for poor posture, uneven pressure, or excessive tension.
Pair any weighting with mindful, deliberate repetition, short sessions, and regular rest. If you use lighter keys, supplement with targeted finger-strength drills and varied rhythms to build durable technique.
How Key Action Affects Posture and Ergonomics for Beginners
Your touch and posture are linked, so the action of your keys can influence alignment and comfort during practice.
If the key feel is too stiff or too light, you might tighten shoulders or bend wrists in ways that strain your back over time. Consider a balance between responsiveness and ease, focusing on posture-friendly action and an ergonomic touch that supports sustainable technique.
Posture-Friendly Key Action
The way a piano’s key action feels can directly influence your posture and overall comfort while practicing. When key action is too stiff or too light, your shoulders, arms, and wrists compensate, creating tension that can fatigue you faster and reduce control.
A balanced action supports an aligned playing stance, encouraging relaxed wrists and a neutral spine. For beginners, consistent touch feedback helps you develop proper technique without overreaching or underpulling fingers.
If your digital piano requires excessive finger pressure, you’ll likely adopt awkward mechanics that hinder progress. Prioritize action that matches your hand strength and technique milestones.
Consider maintenance checks—clean components, proper alignment, and sensor calibration—to sustain predictable response. Integrate mindful posture into beginner practice routines and schedule regular digital piano maintenance checks to preserve consistency.
Ergonomic Touch for Beginners
A consistent, responsive key action supports neutral posture and minimizes strain, letting your arms and shoulders stay relaxed as you play. For beginners, your touch should remain light enough to avoid grimacing yet responsive enough to register intention.
A well-balanced action promotes even weight distribution across the keyboard, reducing tension in wrists and back. Consider keyboard ergonomics when choosing a model or adjusting seating height, bench distance, and chair support to keep elbows at about a 90-degree angle.
Your finger agility benefits from predictable feedback, which helps you climb from slow scales to faster runs without stray movements. Avoid over-pushing; train precision first, then speed. Prioritize a touch that feels accurate, not flashy, to sustain long practice sessions.
The Core Beginner Goals: Accuracy, Velocity, and Consistency
Mastery starts with three core goals: accuracy, velocity, and consistency. You’ll build a solid foundation by prioritizing precise note timing, controlled attack, and steady repetition. Focusing on these elements helps you translate intention into musical results, supporting finger agility and musical expression over time.
Here are three concrete targets to guide your practice:
1) Accuracy: land each note cleanly, with minimal unintended pitches.
2) Velocity: develop even, responsive touch across scales and patterns.
3) Consistency: maintain steady tempo and phrasing across sessions.
You’ll notice progress when errors shrink, rhythm stabilizes, and your expressive choices feel more deliberate.
How Practice Settings and Pedagogy Fit Your Keyboard Choice
Your practice setup and pedagogy should align with the keyboard you choose, balancing how you train (settings) with how you learn (teaching methods).
Consider how practice context—tempo, repetition, and feedback—maps to the keyboard type, and how goals and assessments shape that mapping.
When these elements match, you’ll optimize progress and keep instruction focused on what matters most for your musical development.
Practice Settings Alignments
Practice settings and pedagogy should align with your keyboard choice to maximize progress. When you practice, match your environment to support focused sessions and consistent technique development. Your plan should reflect the instrument’s feel, response, and sonic possibilities to reinforce learning.
Use these considerations to shape daily routines:
1) Set a dedicated practice space with minimal distractions to sustain attention.
2) Schedule short, focused intervals that build endurance and habit formation.
3) Integrate purposeful sound decisions, leveraging your keyboard’s capabilities for feedback.
Remember two key maintenance aspects: Keyboard maintenance and Sound customization. Keep the action clean and responsive, and tailor touch and timbres to your goals. This alignment clarifies goals, streamlines corrections, and accelerates skill acquisition.
Pedagogy And Keyboard Type
While choosing a keyboard type shapes how you practice, the pedagogy you use must align with the instrument’s action, touch, and sound feedback to maximize learning. Your approach should respect how weighted or unweighted keys influence gesture, velocity, and fingering fluency.
Choose teaching strategies that exploit available feedback: pianissimo scales on lighter keyboards, or dynamic phrasing on touch-sensitive models. Incorporate essential concepts like Music theory as a scaffold for reading and ear training, ensuring exercises align with real instrument responses.
Plan sessions around maintenance routines that keep keys balanced and consistent, since irregularities distort technique cues. Be explicit about goals, monitor progress, and adjust tasks to the keyboard’s affordances.
This alignment improves transfer to real performances and long-term skill retention through deliberate practice.
Match With Teaching Goals
When you align practice settings with your keyboard’s action, you create a feedback loop that accelerates learning. Your goals guide the instrument choice and pedagogy, ensuring technique carries into musical outcomes. Focused practice surfaces where you need realism, finger independence, and measurement of progress.
1) Visualize how your genre goals drive touch, tone, and timing, then select exercises that reflect those demands.
2) Pair pedagogy with your keyboard accessories (metronome, lid position, recording), so feedback is immediate and trackable.
3) Regularly reassess: adjust repertoire, tempo, and cues to stay aligned with evolving music genres and performance aims.
This approach keeps instruction efficient, concrete, and connected to real playing, avoiding generic drills.
When to Choose Weighted vs Non-Weighted for Your Long-Term Plans
Choosing between weighted and non-weighted keys should align with your long-term goals and how seriously you plan to pursue piano playing.
If you see yourself performing live, composing, or pursuing classical study, weighted keys provide tactile feedback that helps develop finger strength and control.
For casual practice or rapid progression across genres, non-weighted keys can be enough, speeding adaptation and reducing cost.
Assess your preferred music genre and the kind of repertoire you expect to tackle in coming years.
Remember that some players value aesthetic appeal, so feel the instrument’s response and build a personal sense of touch.
In the end, balance expectations with practice commitment; the right choice should support steady growth without unnecessary barriers.
Budget, Portability, and Trade-Offs for the Right Keyboard
Budget, portability, and trade-offs shape every buying decision. You weigh what you gain against what you lose, focusing on how practical each choice feels in real use. When you consider price, you’re balancing features with durability and future needs, not just immediate appeal.
You’ll also check how well a keyboard fits your space and lifestyle, including weight for transport and setup time. Plan around three core realities:
1) Budget aligns with features like music theory support and responsive keys.
2) Portability matters for gigs, commuting, and storage without sacrificing reliability.
3) Trade-offs reveal whether you prefer richer midi connectivity or compact form over tactile piano feel.
Your goal: maximize practice time, growth, and musical ideas without overinvesting in unused capabilities.
Transitioning to Acoustic Piano: Does Weighted Matter Later?
Shifting to an acoustic piano later on can be smoother if you plan ahead about weighted keys, but it isn’t a guaranteed barrier. When you switch, the core skills—finger independence, touch control, and rhythm—transfer, but the feel changes.
A digital piano’s weighted action isn’t identical to an acoustic’s, yet it primes you for dynamic touch and pedal technique. If you’ve trained with heavier keys, you’ll adapt faster; if you’ve used springy or light actions, you may need a deliberate adjustment period.
The key is consistency and listening to touch feedback during practice. In an acoustic transition, focus on weight distribution, finger precision, and relaxed wrists. Your long‑term goal should be expressive control, not perfect imitation of the instrument’s mechanics.
Quick-Start Checklist: Selecting a Digital Piano That Fits Your Goals
To pick a digital piano that lines up with your goals, start with a clear sense of what you want to achieve—whether it’s mastering technique, enjoying practice sessions, or supporting live performance.
A quick-start checklist helps you stay objective and avoid buyer’s remorse.
- Define your priority: tone, touch, or portability, then compare models that meet that criterion.
- Match features to your beginner experience: weighted keys aren’t universal must-haves; consider useful aids, connectivity, and built-in lessons.
- Set a budget with a realistic plan for growth: invest where friction points occur, not where you don’t practice.
Keep it concise, test-play, and verify compatibility with your goals and space.
Conclusion
You’ll find fundamentals first: finger independence, posture, and consistent practice beat fancy features. Focus on feel, not fluff—choose what fits your budget, portability, and goals. Weigh your wish list: weighted, semi-weighted, or non-weighted keys. Prioritize practical progress over punchy specs. Plan for shift to an acoustic later if that’s your aim. Pick pragmatically, practice patiently, and progress persistently. Practical preparation produces polished performance, regardless of the pedal or pressure.