You’re choosing between a keyboard and a digital piano, and the decision hinges on touch, sounds, and purpose. A keyboard prioritizes versatility and portability, while a digital piano emphasizes a piano-like feel and authentic tone. Your goal drives what to value first—weighted keys, realistic response, and expressive control vs. variety of voices and features. It’s a practical trade-off that reveals what gains you more in practice, performance, or studio work, and that tension will guide your next move.
Keyboard vs. Digital Piano: The Core Difference
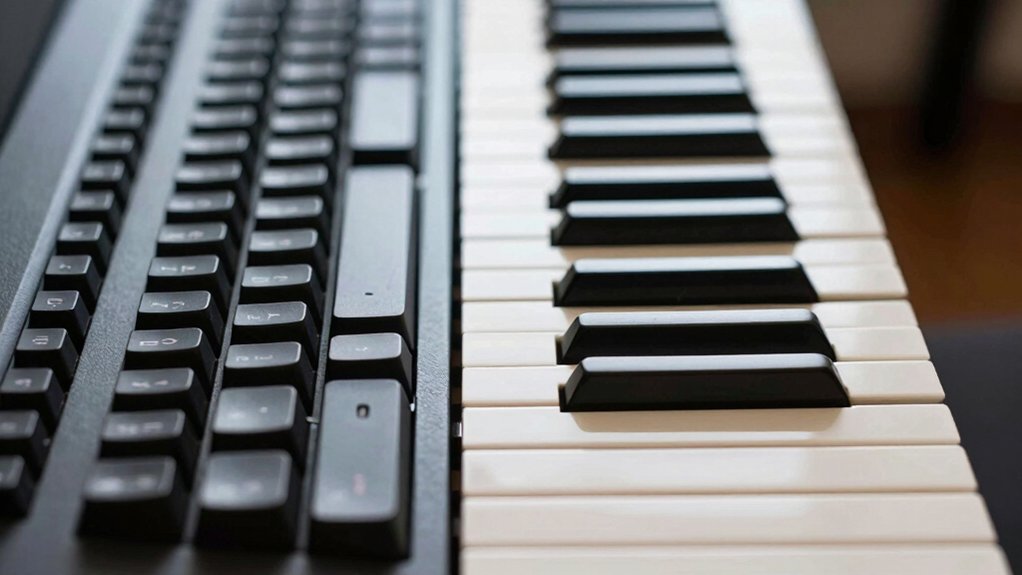
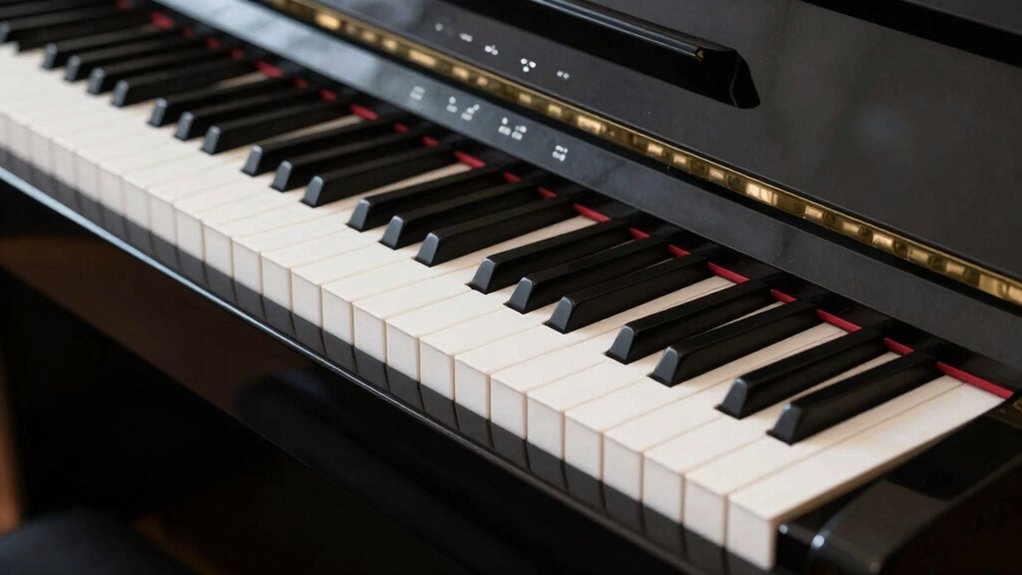
The core difference between a keyboard and a digital piano lies in purpose and construction: a keyboard focuses on portability and a wide array of sounds, while a digital piano emphasizes authentic piano feel and response.
You assess models through how they support music theory practice and performance needs, not just presets. A keyboard typically prioritizes versatility, routing options, and ergonomic design that accommodate fast sessions, layered sounds, and easy quick access.
In contrast, a digital piano aims for weighted action, keyboard responsiveness, and realism that support expressive technique. You’ll notice scales, chords, and progressions feel more grounded on a digital piano, yet you’ll miss tactile nuance on cheaper keyboards.
Choose based on how you balance ergonomic design with your theoretical practice goals.
How Keys and Touch Define Playing Feel
Keys and touch are what make playing feel real or artificial, and they’re the bridge between a keyboard’s versatility and a digital piano’s realism. You assess how keys respond to your touch: is the action smooth, consistent, and weighted to mimic acoustic pianos? This is key action.
When you press, you should sense resistance, which guides dynamics and articulation. If the action is inconsistent or overly light, expression suffers, and the instrument stops feeling like a piano.
Sound quality matters, but touch completes the impression you get from playing. A well-balanced keyboard offers nuanced control, enabling subtle phrasing, while a digital piano should translate keystrokes into expressive volume and tone changes.
In short, precise key action plus faithful sound quality determines authenticity in feel.
Voices and Sounds: What Each Device Can Do
Voices and sounds differ in how each device shapes expression: a keyboard often emphasizes versatility with a wide array of timbres and layer options, while a digital piano prioritizes faithful, piano-like tone and dynamic response.
You’ll notice two core strengths: a keyboard’s broad sound palette and a digital piano’s authentic feel.
- sound layering capabilities let you stack textures, creating richer performances.
- voice customization lets you tailor tones to your playing style and genre.
- dynamic sensitivity captures touch, shaping timbre as you play.
- continuity of tone across registers ensures consistency in performances.
In practice, you’ll lean on a keyboard for variety and experimentation, while a digital piano delivers consistency and realism for ensemble and recording needs.


Expressive Control: Pedals, Aftertouch, and Beyond
Pedal responsiveness and aftertouch nuances shape how expressiveness translates to performance, so you feel immediate control over dynamics and articulation.
You’ll notice how subtle pedal depressions respond differently across keyboards and digital pianos, which can redefine phrasing and sustain.
This section starts with a concise look at how these controls set the baseline for nuanced expressivity.
Pedal Responsiveness
Because sustain and expression hinge on how pedals respond, you’ll notice that the input-to-sound mapping varies between devices. You’ll feel differences in how hard you press, how long you hold, and how the pedal’s return translates to decay and dynamics on screen. Focus on feel, not just specs, and note how a display screen communicates pedal status and half-pedal sensitivity.
- Compare pedal weight to predict how expressive you’ll be in legato lines.
- Check if the display screen shows real-time pedal position and sustain depth.
- Observe how release timing affects note decay and articulation.
- Evaluate compatibility with other controls—volume, expression, and key weight—to maximize expressive control.
Aftertouch Nuances
Aftertouch adds a layer of expressivity by delivering nuanced dynamics after a key is struck. In practice, aftertouch nuances let you carve more color without re-voicing, shaping vibrato-like intensity, note bending, or subtle expressiveness as you press harder.
On some boards, this pressure data is mapped to volume, timbre, or modulation, giving you post-note control that mirrors your phrasing. The quality hinges on keyboard sensitivity: some keyboards respond smoothly to every gram of pressure, while others feel abrupt or inconsistent, limiting expressive range.
If you prioritize expressive control, verify that the aftertouch is reliable across the full keybed and at various velocities. Remember, this feature complements pedals and dynamics, not as a substitute for thoughtful touch or musical intention.
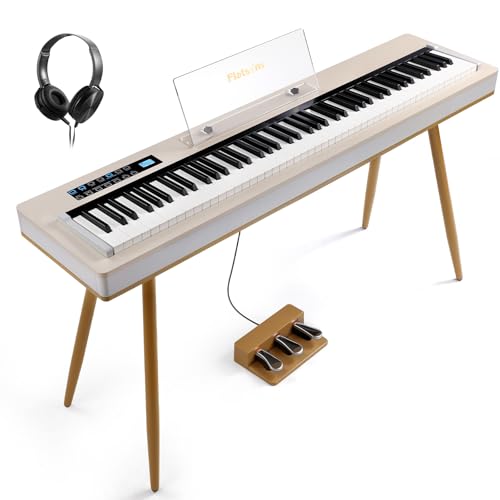
Portability, Power, and Setup: Weighing Your Space
When evaluating portability, power, and setup, the key question is how much space you’re willing to allocate and how often you’ll move or store the instrument.
- Consider overall footprint and weight to determine if you’ll handle it single-handedly or with a cart.
- Compare power needs: battery options offer true portability, while AC power ensures consistent performance.
- Assess setup time: quick-connect pedals, stands, and stabilization affect how often you’ll actually use it.
- Evaluate sound quality and user interface implications, since easier control reduces setup fatigue and improves practice flow.
Connectivity for Learning and Production
You’ll want reliable, flexible connections that support practice, recording, and collaboration, so prioritize devices and interfaces that streamline learning workflows and production setups. Connectivity for learning and production centers on MIDI integration and software compatibility.
A keyboard or digital piano should offer straightforward MIDI over USB or traditional 5-pin jacks, enabling immediate data transfer to DAWs, learning apps, and virtual instruments. Check driver availability, class-compliant operation, and low-latency performance to avoid timing issues during practice and tracking.
Guarantee your device pairs with your preferred software without repeated reconfigurations. Support for standard virtual instruments, score editors, and classroom platforms matters as you scale from practice routines to multi-track productions.
In short, seamless MIDI integration and broad software compatibility minimize setup friction and maximize creative momentum.
Which Tool Fits Your Goal: Beginners, Performers, or Studios
Choosing the right brand and model, depends on your goal: beginners, performers, or studios. Your choice hinges on how you’ll grow and what you’ll produce. Start with a quick framework to align features with outcomes.
- Beginners: prioritize feel, reliability, and onboarding aids; choose a model that supports your music genre and progressions.
- Performers: emphasize action response, dynamic range, and consistency under pressure; brand reputation matters for service and firmware updates.
- Studios: seek multi-voice polyphony, recording compatibility, and long-term stability; versatility wins in varied sessions.
- Budget-aware: balance upfront cost with future-proofing, so you stay aligned with your evolving music goals.
Aim for instruments that match your genre, with trusted brand reputation guiding long-term value.
How to Evaluate Tools: Criteria You Must Check
You’ll start by identifying Tool Selection Criteria that matter for your goals, from feel and playability to features and budget.
Then, apply Evaluation Metrics Essentials to compare options objectively, focusing on reliability, update cadence, and long-term support.
Keep the review tight and actionable, so you can decide what to test first and what to measure during your hands-on checks.
Tool Selection Criteria
When evaluating tool options, start by defining your goals and constraints. Then map each tool’s capabilities to those needs. You’ll compare how a keyboard or digital piano supports your music technology and sound engineering workflows, not just specs.
Focus on practical fit, future-proofing, and ease of use.
- Align capabilities with your project goals to avoid feature overload.
- Prioritize compatibility with your existing gear and software.
- Assess build quality, reliability, and long-term support.
- Test tactile feel, sound versatility, and workflow efficiency under realistic sessions.

Evaluation Metrics Essentials
Evaluation metrics matter because they translate vague goals into measurable criteria. You assess tools by fit, function, and reliability, not vibes or hype. Define core needs first: touch feel, response time, and durability, then map them to concrete tests.
For tactile feedback, simulate real playing scenarios, compare sensor latency, and verify consistency across sessions. For sound customization, insist on accessible editing, polyphony, and preset versatility, plus how smoothly you can save and recall tweaks.
Score each criterion on a transparent scale, documenting edge cases and failure modes. Consider compatibility with your workflow, updates, and support. Avoid overreliance on specs; pair them with hands-on trials.
Finally, weigh value against price and long-term maintenance to choose tools that stay aligned with your evolving playing style.
Budget, Value, and Long-Term Versatility
Budget and long-term versatility hinge on upfront cost, build quality, and the range of features you’ll actually use over time. You’ll weigh what matters for ongoing value, not just sticker price, and how it fits your musical genres and recording techniques.
1) Upfront cost vs. long-term value: buy smart, not cheap.
2) Build quality: durable keys and components matter for longevity.
3) Feature relevance: prioritize sounds, connectivity, and apps you’ll actually use.
4) Versatility: ensure room for growth with compatible accessories and future updates.
Quick Start Guide: Decide and Buy With Confidence
Want to decide and buy with confidence? Start with a clear cut list of needs: how you’ll use the instrument, where you’ll play, and your budget.
Compare keyboard ergonomics to ensure comfortable reach, wrist posture, and key action for long practice sessions.
Prioritize features that matter most: weighted keys for a digital piano feel, reliable polyphony, and essential connectivity.
Assess build quality and digital piano durability—look for solid chassis, reinforced hinges, and stable stands.
Check warranty terms and service options, not just price.
Read model-specific reviews about key response and noise, then test feel in a store if possible.
Eliminate models with redundant modes you won’t use.
In short, balance playability, longevity, and value to buy with confidence.
Conclusion
In short, you don’t have to choose for life—you’re choosing for right now. If you want piano-like feel and focus, a digital piano nails it; if you crave variety, portability, and on-the-fly sounds, a keyboard fits. Consider touch, voices, and pedals, then your space and budget. Test both and imagine your setup year from now. Bottom line: pick what keeps you motivated and makes your music flow—don’t overthink it, just get playing and ride the wave. It’s a win-win.