Piano keyboard simulation isn’t a perfect substitute for a real piano, but it can be a practical stepping stone for beginners. You’ll evaluate how touch, latency, and feedback affect your progress and how on-screen notation translates to real performance. You’ll also weigh the benefits and limits of practice tools against traditional lessons. If you want a clearer path forward, start by considering your goals and the equipment you already own, then explore the options that align with your approach.
What Is Piano Keyboard Simulation and Why Beginners Care

Piano keyboard simulation is a software or hardware tool that replicates the layout and feel of a real piano keyboard, letting you practice notes, scales, and songs without a physical instrument. You assess its value by comparing input responsiveness, key weighting, and dynamic range to a traditional instrument.
You’ll experience consistency across sessions, which supports repeatable drills for technique and fingering. You can measure progress through built-in metronomes, playback accuracy, and interval recognition.
Beginners benefit from structured routines that bridge theory and practice, especially when combined with digital pianos for repertoire exposure. Virtual lessons often augment self-directed work, offering guidance, feedback, and pacing.
If you prioritize accessibility and scalable instruction, this approach aligns with practical skill development and measurable outcomes.
How Keyboard Mechanics Translate to On-Screen Keys
Keyboard mechanics on a digital or on-screen keyboard map directly to physical keys through consistent spacing, key width, and resistance models. You feel tactile cues when pressing, and apps translate force, travel distance, and velocity into note events.
Empirical testing shows consistent spacing reduces miskeys, while uniform key width maintains predictable touch areas across the keyboard width.
Digital amplification helps you hear volume changes proportional to your input, reinforcing timing and dynamic control without altering pitch.
Key weighting—the relative resistance you perceive—changes perceived touch responsiveness, influencing touch accuracy and practice consistency.
On-screen implementations emulate physical feedback using haptic or auditory cues, but fidelity depends on the software’s calibration and hardware latency.
In practice, precise mapping supports transfer of trained motor patterns between devices, aiding gradual skill development.
Essential Features for Beginners: Touch, Latency, and Feedback
You’ll examine how touch responsiveness shapes your playing, noting small timing differences that affect feel and accuracy.
You’ll compare latency across setups to see how delay changes your ability to stay in rhythm and express nuance.
You’ll assess feedback cues—haptics, audio response, and visual indicators—to determine how they guide your technique and practice efficiency.
Touch Responsiveness Nuances
When you start practicing, the way a keyboard responds to your touch determines how accurately you can translate intention into sound. In this section, you evaluate touch responsiveness by isolating physical input from sound output.
You’ll compare actions like light versus firm key presses on multiple devices, noting consistency, repeatability, and range. Document how velocity curves, if present, translate to dynamics in volume and timbre, and distinguish between linear and stepped responses.
Focus on touch sensitivity and key responsiveness as measurable traits: how small differences in touch produce audible changes, and how repeatable those changes are across sessions.
Avoid extrapolation; rely on controlled tests with uniform technique. Results should guide your selection of keyboard models that deliver predictable, teachable responses for beginners.
Latency Impact Understanding
Latency shapes how your intended touch becomes audible result, and it matters just as much as touch sensitivity in beginner practice. You’ll notice that even small delays alter timing and feel, shaping your initial musical decisions.
Approach this topic empirically: measure response times from key press to sound, compare devices, and track consistency across sessions. Understand that latency influences your ability to reproduce rhythmic patterns and dynamics, not just tone.
Prioritize hardware and software setups that minimize delay, while recognizing trade-offs with features and processing. Consistent practice with a calibrated system builds technical accuracy and clearer musical expression over time.
Document results, adjust practice tempo, and validate improvements against objective benchmarks rather than perception alone. Clear measurements drive actionable improvements.
Pros and Cons of Keyboard Simulation for Beginners

There are clear trade-offs when using keyboard simulation for beginners: it can speed up practice sessions and provide immediate feedback, but it may also mask the feel of a real piano and hinder development of touch.
In evaluating pros, you gain consistent practice tempos, repeatable drills, and accessible input from digital pianos and apps. These tools support data-driven progress, enabling you to track accuracy, timing, and articulation.
On the cons side, you may experience diminished sensory input from tactile feedback, which can slow transfer to acoustic piano touch. Realistic key action is often imperfect, and cost or setup complexity can limit ongoing use.
How to Pick Hardware and Software for Keyboard Simulation
Start by evaluating hardware selection with clear criteria: latency, build quality, and compatibility with your preferred software. Then match software options to your system, focusing on audio interfaces, MIDI controllers, and instrument libraries that align with your budget and workflow.
Finally, estimate setup costs across hardware and software, and test total throughput to confirm you’re within your target budget.
Hardware Selection Tips
When choosing hardware and software for keyboard simulation, start with the basics: what you want to simulate, your budget, and the minimum latency you’ll tolerate. Build a checklist that links your goals to measurable specs: keyboard action, key count, velocity curves, and software features.
Prioritize input devices that mirror real playing feel—digital pianos often balance touch with price, while generic MIDI controllers may save money but require tweaks. Assess compatibility with your operating system, drivers, and the DAW you’ll use; ensure stable performance under sustained sessions.
Test input latency at your typical project load, and verify buffer settings won’t compromise timing. For visuals and feedback, consider whether you want standalone hardware or integrated virtual keyboards within a host.
This approach reduces guesswork and aligns gear with practice needs.
Software Compatibility Guide
Software compatibility is the backbone of reliable keyboard simulation, so start by mapping your DAW, plugins, and drivers to the hardware you’ve chosen. You’ll test latency, stability, and driver versions in a controlled workflow, noting how each element affects musical expression and responsiveness.
Establish a repeatable setup procedure: install, configure, reboot, and verify plugin compatibility before practice sessions. Prioritize interfaces that support your OS and sample rates, then document buffer sizes and CPU load to prevent surprises during recording.
Regularly update firmware when available, but rollback if conflicts appear.
Finally, assess how your grip and finger strength adapt to different keys and velocities, ensuring the rig remains ergonomic and repeatable.
- Evaluate latency impact and musical expression across gear
- Document compatibility steps for future sessions
- Track ergonomic comfort and finger strength during use
- Create a concise troubleshooting checklist for updates
Budgeting and Setup Costs
Budgeting and setup costs come down to balancing performance needs with budgetary reality. You’ll evaluate input devices by cost, feel, and consistency, then align software with your goals.
Start with a modest controller or keyboard of 49 to 61 keys, noting that cost-effective options often include bundled packages with basic software. Consider latency, key action, and USB compatibility, since these affect playability more than brand prestige.
For software, prioritize beginner-friendly setups that offer essential features: metronome, lesson modes, and sufficient audio latency control.
Plan for headphones or decent speakers to avoid extra soundproofing. Factor maintenance and future upgrades, not just upfront price.
Document your criteria, compare models, and test briefly to confirm straightforward setup and reliable performance.
Set Up Your First Keyboard-Simulation Practice Session
To set up your first keyboard-simulation practice session, choose a quiet, distraction-free space and organize the basics: a stable surface for your keyboard, a metronome or rhythm app, and a comfortable chair.
- Define a fixed practice window and record your goal for each session.
- Calibrate tempo slowly, then increase as accuracy improves.
- Position hands and wrists for natural alignment to boost finger dexterity.
- Select a short, focused exercise to measure musical expression progress.
This approach is empirical: observe, adjust, and repeat. You’ll build consistency by separating setup from execution, minimizing wasted time.
Track subtle changes in tone, timing, and dynamics to quantify improvement. Maintain discipline, yet stay curious about how precision shapes musical expression and technique over multiple sessions.
Structure a Beginner-Friendly Practice Plan With Simulations
A practical beginner plan uses short, repeatable simulations to build finger control and musical reading, so you can track progress clearly from session to session. Structure your workouts around three core blocks: technique, reading, and repertoire micro-phrases. Each block lasts 5–10 minutes, with exact numbers you log after every session.
For technique, repeat scales and five-finger patterns slowly, then increase tempo only when accuracy stays above a chosen threshold.
For reading, use simple sheet music excerpts and annotate fingerings, focusing on notes and posture rather than speed.
For repertoire micro-phrases, select brief musical ideas that demonstrate musical expression within a single motif.
End with a quick self-check: note accuracy, tempo stability, and alignment with your goals. Integrating simulations reinforces consistent progress toward tangible outcomes.
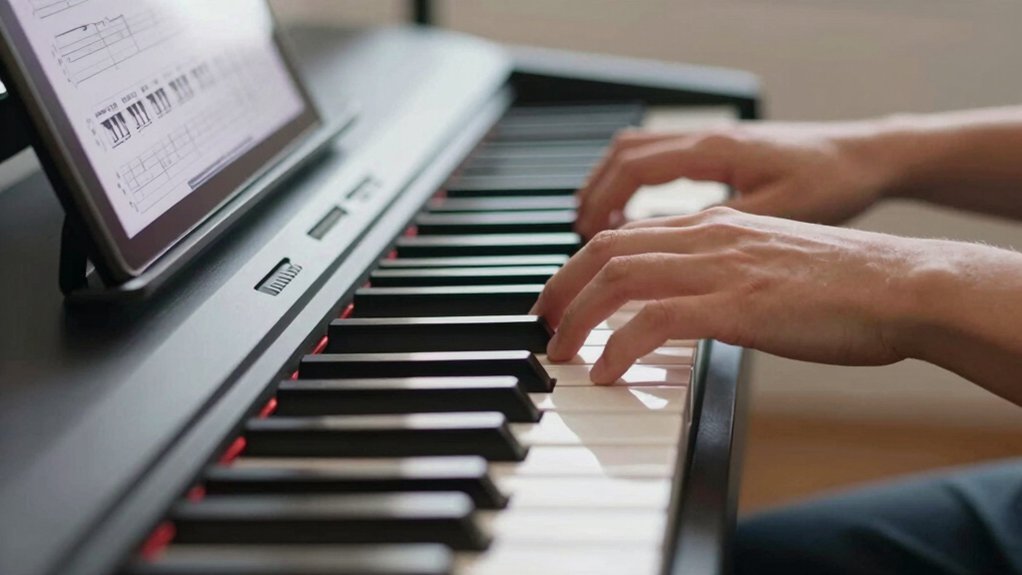
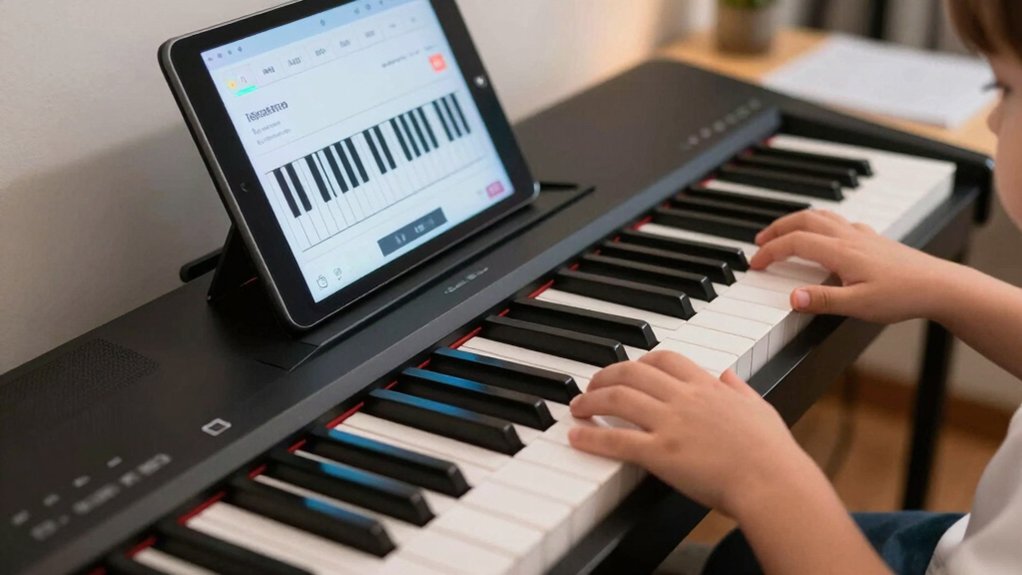
Reading and Rhythm With On-Screen Notation
On-Screen Notation Use lets you view notes alongside timing, so you can correlate what you see with when you play.
Rhythm Alignment Tools provide immediate feedback on tempo and beat placement, helping you adjust your counting in real time.
Approach is empirical: test a short pattern, observe the onscreen cues, and refine your timing until the notation and click align.
On-Screen Notation Use
With on-screen notation, you’ll read notes and rhythms directly from the display as you play, which helps you connect visual cues to fingerings and timing. In this approach, you evaluate notation accuracy by comparing sung or played pitches against the onscreen staff, then adjust hand position accordingly.
Visual clarity matters: clean note stems, legible fonts, and distinct rhythms reduce cognitive load, letting you focus on technique. You’ll develop a methodical routine: verify each note before attack, monitor tempo, and confirm alignment with metronome marks. This process supports incremental learning and objective progress tracking.
- Establish consistent eye-hand coordination through early, precise readings
- Prioritize font size and contrast for faster parsing
- Align fingerings with displayed positions to minimize guesswork
- Use timing feedback to refine rhythm accuracy over repetitions
Rhythm Alignment Tools
Rhythm alignment tools help you synchronize pulse and notation by providing immediate feedback on timing. In practice, you compare your played notes to the on-screen notation and observe timing deviations. These tools quantify lag, aheadness, and rhythmic precision, enabling you to adjust pace and attack accuracy.
Gesture controls let you start, pause, or loop passages without breaking concentration, supporting focused practice sessions. Visual feedback highlights correct rhythms and marks errors in real time, fostering quick corrective action.
You can test different tempos to map your learning curve, track progress, and identify stubborn patterns. By repeating targeted sequences, you cultivate consistent tempo, subdivision awareness, and note length discipline.
Common Beginner Mistakes: And How to Dodge Them
Common beginner mistakes in piano practice often stem from skipping fundamentals or rushing progress. You’ll slow learning if you skip proper warmups, neglect posture, or overestimate your listening. Approach practice with measured steps, recording progress to reveal gaps in technique and musical expression.
- Prioritize steady tempo over flashy speed to conquer technical challenges.
- Build a consistent routine that reinforces posture, finger independence, and breathing.
- Separate technique from expression, then fuse them only after basics clarify.
- Listen critically, using a metronome and slow playback to identify weak links.
Integrating Simulation With Traditional Piano Methods
Integrating simulation with traditional piano methods bridges modern practice tools and time-tested technique, enabling you to verify concepts in real-time while you learn. You combine tactile feedback from physical keys with digital cues, comparing fingering, timing, and dynamics across formats.
Empirically, you measure progress by repeating passages, noting how virtual instruments respond to your touch and phrasing, then adjusting technique on the actual keyboard. This approach aligns with digital pedagogy, ensuring instructional methods reflect current technology without abandoning core fundamentals.
Structure your sessions: warm-up with scales, then transfer what you practiced in the app to the piano, observing consistency in tempo and touch. Maintain clear goals, document results, and refine practice strategies to optimize transfer between simulation and the traditional instrument.
Is Keyboard Simulation Right for You? Decision and Next Steps
Deciding whether keyboard simulation fits your practice hinges on how you learn and measure progress. You’ll evaluate fit by testing structure, feedback quality, and time efficiency across sessions.
Compare results from digital pianos and keyboards with built-in metronomes, tuning consistency, and touch response to traditional practice. If you notice steady skill gains, it’s a positive signal; if not, reframe goals or mix methods.
Prioritize clear milestones, such as repertoire accuracy, rhythm stability, and sight-reading pace, and track them over weeks. Consider access to virtual lessons and the consistency of feedback.
Decide in favor of a tiered plan: trial period, short-term goals, and a review step.
- Define measurable benchmarks before committing
- Assess feedback usefulness and adapt accordingly
- Integrate digital pianos and virtual lessons strategically
- Schedule regular reviews to adjust methods
Conclusion
Consider keyboard simulation as a seed and raincloud combined: it nourishes beginner practice while the real piano remains the sun that hardens your technique. The instrument you hold online is a symbol for discipline, feedback, and incremental progress; the acoustic piano echoes the true texture of touch and expression. Use it as a methodical scaffold, not a replacement. Time, consistency, and transfer to real keys will determine whether your garden of skills bears lasting music.